The Making of the RiverSong Mando
It makes sense to me as a luthier to focus on building instruments that I personally play. I’ve done stints in bands on guitar, bass, and fiddle, but my real love is the mandolin, which I played in various bands for many years. What follows is a skeletal overview of the construction of hand-made fully-carved mandos, both A5 and F5 styles, completed over the last couple of years.
Lloyd Loar of Gibson pioneered the modern F5 as we know it, and many (if not most) current mando makers also owe a debt of gratitude to Roger Siminoff, whose research into Loar’s work resulted in a manual of construction with blueprints that has been the springboard into mando construction. Thanks, Roger!
RiverSong Mando
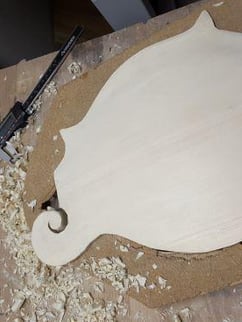
A couple of additional tools can be seen above: a scraper, used for delicate wood removal, and, in the case, a Hacklinger gauge (a “Hack”) that can take precise measurements of thicknesses. This is a critical business at this place of construction.
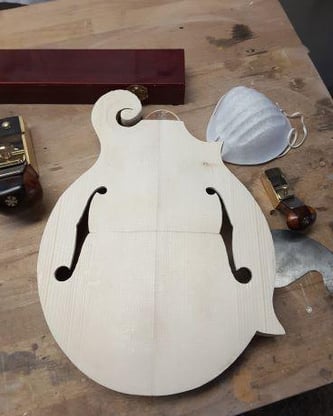
A knot in the wood is visible just north of the treble F hole. This disfiguration wasn’t apparent until I removed wood, and I’m not tossing a perfectly good top because of it. After sunbursting, it’ll be gone.
Wow! We’re moving right along! (When I’m asked how long this takes, I say a human gestation period: about 9 months).
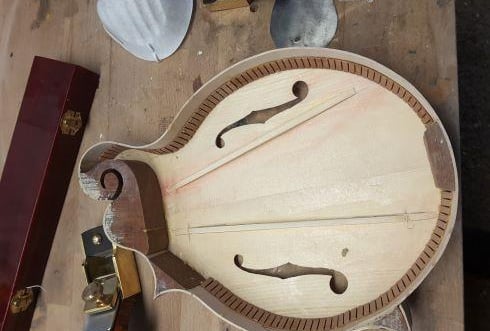
Below: I’ve attached kerfed lining to the ribs where the top will be glued and glued the top to the ribs/frame. You’ll note that the F pictured below has a significantly different head block than the A pictured before. This is to account for the scroll, which the A lacks. Also note the mahogany blocks at the points.
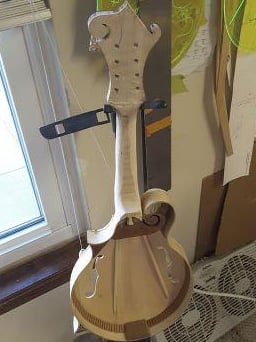
Here is an F model in the same place of construction. Note that the back of the neck is still pretty rough and will need a good bit of shaping. Next step is kerfing for the back and installing the back, which has now been carved (from maple), carefully graduated as was done with the top.
Somewhere along the line, I’ve created a fingerboard and fitted it to the completed neck blank.
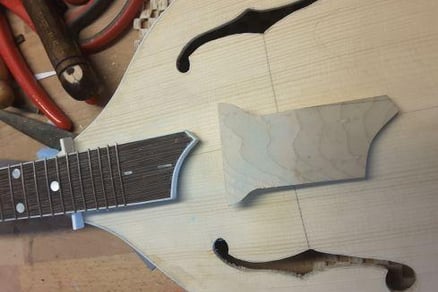
At some point while fitting the neck, I’m creating and fitting a fingerboard support out of maple, as illustrated below:
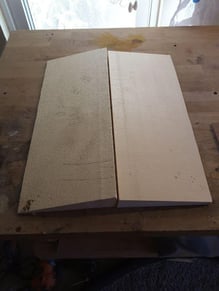
Now, it’s time to make a top. I’ll take 2 wedges of Spruce (I’m using Adirondack/Red Spruce) and carefully join them together:
In the A model above, I’ve got frets installed but not finished: fret ends protrude over the sides of the board. A shaped plastic insert, visible above, separates the neck joint from the board support/extension.
Step One, for either the A or F style, is bending the sides from strips of carefully cut and sanded maple. Once bent, the sides are fitted into a mold and held in place with a spreader. Right: the beginnings of an A-style.
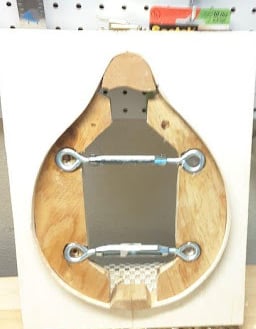
Note that the head and tail blocks have been cut, shaped, and glued into place. The plywood spreader with turnbuckles holds the rim in proper shape until it’s time to glue the top on. The A is a simple affair compared with the F, since the F has 2 points and a scroll that must be incorporated into the sides and the headblock at this point.
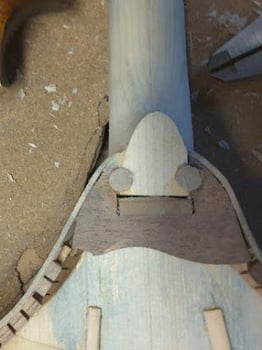
The photo on the right shows the neck glued into the joint of an A model. Note the two hardwood dowels securing the joint. This neck ain’t going anywhere!
Also in the photo above, you will see that 2 tone bars have been created, glued in, and shaped. These are a bit asymmetrical: the bar on the bass side is a tad thicker and located closer to the F hole than the bar on the treble side. And again, I’m tapping and listening as I go.
Don’t seem to have any pics of the making of the neck, but the process is more-or-less the same as making the neck for the archtop guitar detailed elsewhere on this site. I use a dovetail joint for connecting the neck to the body and cut the dovetail on a homemade jig using the bandsaw. Once the joint is roughed in, there follows the inevitable fitting to ensure that the neck-to-body angle is correct with the neck straight in the joint.







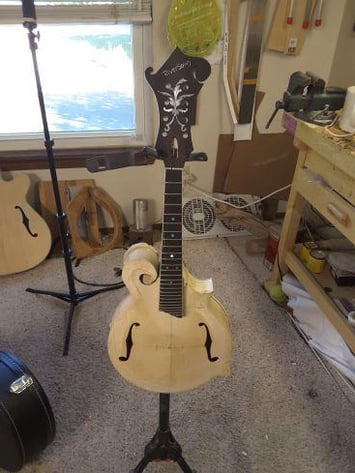


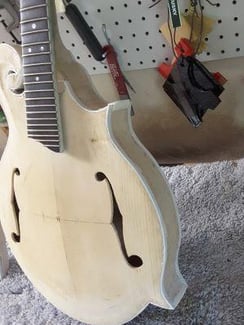


However, the binding channels for the body and headstock scrolls must be cut by hand. I measure and mark the channels carefully with pencil, then use micro chisels to carefully cut out the channels (thanks, Dockyard!) It’s a painstaking and time-consuming process. In the picture above, you can see that I have scraped the outline for the scroll. I’ve fitted bone for the lower corner and am in the process of fitting the corner of the upper bout.
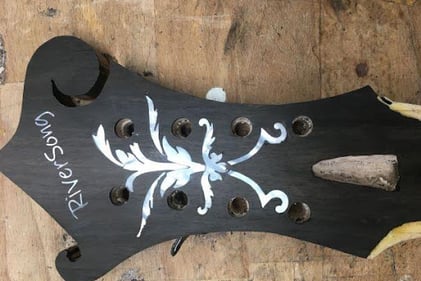
I’ve inlayed a traditional “fern” design on the headstock of this F model but have maintained a more simple dot system for the board. Back is now attached; extra wood, soon to be trimmed off, is visible in the pic above. This mando is now structurally complete. But not quite done!
Time for binding. I have a jig & router system that works beautifully for “regular” guitar bodies. This can be used for the lower parts of the instrument.
Backtracking a bit: the headstock for an F model; inlay completed; binding channels have yet to be cut. Much sanding and finishing yet to do!
With the building complete, I’ve now sanded—and sanded—and sanded—because any file mark or sanding scratch that I’ve missed will show up like magic once I spray the first lacquer coat. Here, I’ve taped off the binding (as much as possible: I’ll just scrape the binding around the scrolls later on). I’m now shooting finish. I begin with an amber coat all over, then move to a red/brown for some of the instrument. I’ll finish by shooting the edges with a dark walnut/black tint that will complete the sunburst.
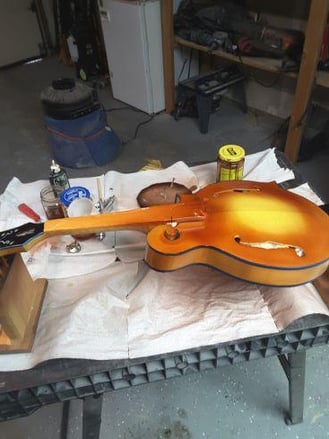


Once I’ve shot color, there follows 10 or so coats of clear gloss instrument lacquer. The instrument must now wait 2 weeks for the next step. The lacquer feels dry at this point but isn’t. After a couple of weeks, I will wet sand the entire instrument, beginning with 800 grit and working through to 2000. In the picture above, you can see a stippling in the finish that must be sanded completely flat (hopefully without sanding through to the color!) The instrument will have lost its gloss and will now be dull over all. And then to the buffer!

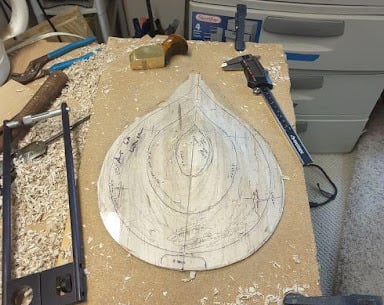
Once joined, the carving process begins. After joining the billet, I’ll use a template to pencil out the final shape of the top, then cut it out on the bandsaw, leaving a bit of extra wood all around. That done, the carving can begin.
Here’s a shot of the top for an F model nearing completion. As previously noted, the points and the geometry of the scroll add complexity (and cost) to the making of the F style.
Now that the graduations have been completed, time for F holes. I depend on a template and a few calculations to determine the exact placement and shape.
In the photo above, I’ve made good progress in strategically removing wood from the joined and shaped top. Lots of shavings! My primary tools are palm planes, one of which can be seen above. An acrylic template is marked with the thicknesses I’m trying to achieve in each area of the carving. In addition, I have arching templates derived from Siminoff’s analysis of seminal Gibson mandolins that are guiding the process.
I’m carving both the inside of the top to be as well as the outside, aiming for the correct archings and thicknesses. The black scissors-looking gadget is a marking caliper: set to a specific thickness, it marks high and low places. At first, I tend to hog out a lot of wood quickly, but as I get close to the desired archings and graduations, I go much more slowly, flexing the top and tap tuning by taking out shavings of wood.
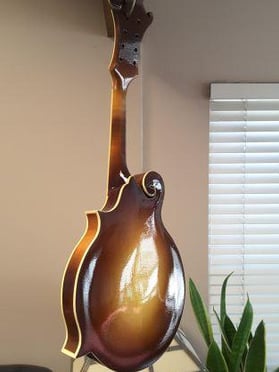
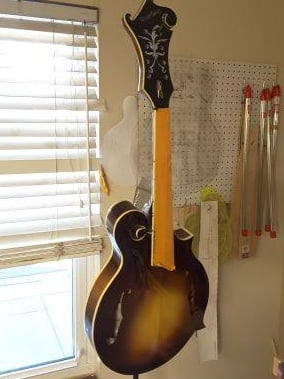
Following the buffing, it’s time to see what I’ve created. Time to fit a bridge, cut a nut, fit the tuners, and string her up for the first time. And in the case of the F above, a fine success!
So there you have it: a very brief overview of mando making at RiverSong! Please let me know if you’d like to check out this or other handmade RiverSong instruments!

CONTACTS
John Cross
720.883.6728
Jcross@riversonglutherie.com

